Transforming Your Home: A Colorful Journey
"A house is a reflection of the heart." – A wise saying, isn't it? Painting a house isn't just about color; it's about expressing yourself, making a space your own, a tangible change!
Why Paint?
- Fresh look for your house
- Boosted morale
- Makes space more inviting, friendly, lovely
- Improved property value, adds to your home worth
Painting a house is one way to truly beautify and enhance it. This article hopes to share insights, strategies, steps & reviews to make this DIY project as exciting and successful as it can be!
Planning is Key – "The Secret of a Successful Painting Job!"

Source: royalpainthomesolution.com
Before diving into vibrant colors, ask these crucial questions:
- What are my goals for this painting job? (e.g., making my kitchen cozy, updating the dining room).
- What's my budget for paint and tools? (Set a reasonable amount)
- What are the ideal colours (check out some samples!) that perfectly suit my home design and taste?
Budget Check – Keep in mind the price.
- Cost of Paint (Different brands vary)
- Paint Roller
- Paint Brushes
- Drop Cloths (essential!)
- Other necessary tools
- Cleaning products
Pro Tip: Ask friends, neighbours (or relatives). Getting a feel for the costs involved is always helpful.
Color Palette – Colors for All Taste
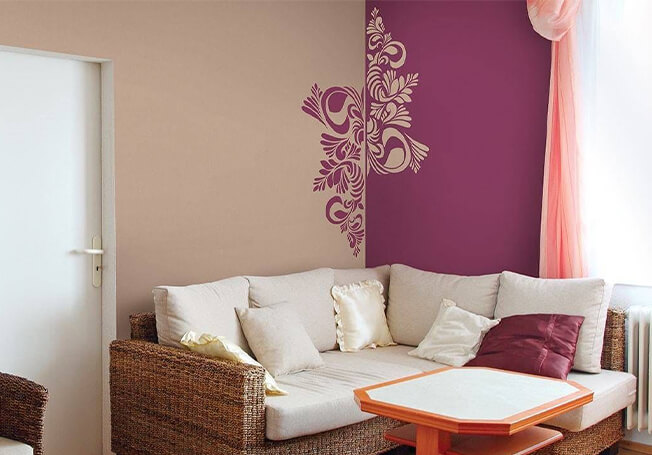
- Warm Colors (red, orange, yellow) – create inviting and happy feelings, adds a welcoming touch, creates coziness, a sense of comfort, warms a room, makes a place friendly. (Perfect for family rooms, living spaces).
- Cool Colors (blue, green, purple) – are serene and calm, promote peace. (great choice for bedrooms or quiet areas).
- Neutral Colors (beige, gray, white) – Versatile, blend well with other colours. (Ideal for hallways or guest rooms)
Personal Note: I chose light gray for my bedroom because I adore it's simplicity and calmness!
What are your personal preferences? (Important!)
- Consider the overall tone or design, furniture styles, room use. (example – use deep colors in bedrooms to foster relaxing environment).
- Seek inspiration by researching ideas or colours (Pinterest, online resources are fabulous)

Source: dreamstime.com
Preparation Work
Key steps in prepping for the painting job:
- Remove anything unnecessary (pictures, items from the wall).
- Clean and scrub the wall surface!
- Fill holes, cracks or patches!
Important Consideration:
- Test your paint (example – mix with the wall) – to see the exact shade
- Sand surfaces – This prepares the wall for a smoother paint finish.
- Prime the wall – Primer helps the paint last longer!
(Safety Note! – Wearing protective gear, safety glasses etc., helps a lot while working! Protect yourself).
Tools and Materials
- Paintbrushes – needed for intricate areas
- Paint Rollers – for broader wall coverage, a vital painting tool
- Paint Trays – keep paint organised (choose trays suitable for your work, consider size for smooth and effortless working)
- Drop Cloths (a Must, use large drop cloths for an efficient painting job). Save yourself stress; a mess is disastrous (Trust me, from experience!).

Source: asianpaints.com
DIY tips – some words of advice
- Stir the paint – properly blend and mix.
- Lay drop cloths carefully
- Use the roller or brush to spread an even coating on the walls – be sure you keep all surfaces properly covered

Source: freepik.com
The Actual Painting Job
Paint Like a Pro!
Here's a general process, follow for good painting!
- Apply a coat of paint in smooth strokes (be regular and rhythmic) – avoid patchy finishes (Try working a small area with uniform coatings.
- Follow with another coat – once first coat is completely dry, apply the second coat to reach desired coverage. This results in a fantastic, consistent finish.
- Allow sufficient drying time – Don't rush through it, give it time to thoroughly dry to reach best finish (example, at least overnight for paint type).
Expert Tip:
(When possible), make several test coats with the selected colours in a specific section (Example – Paint a small corner or an inconspicuous wall space in test-size swatches and give adequate time to dry, if necessary). Assess this and judge if the colour blends in your preferred fashion before the bigger job.
Possible challenges & potential issues:
- Some might run into uneven surfaces; do some touch-ups, filling or patching as you go.
- Unwanted splatters could occur (This might seem common, yet can happen).

Source: dreamhomepaintingservice.com
What others are saying:
"I was incredibly impressed by how smooth the walls looked after painting. Even with a novice approach, the process was less strenuous, and very effective!" – Sarah (Facebook review).
"The final result of the house transformed to better meet our desires – we had such happy feedback!"– John. (Social Media Review).
After Painting
- Allow extra drying time.
- Do the finishing touches such as replacing items (fixtures, items removed from wall space), wall trim, furniture arrangements
- Put all the stuff back
- Admire the handiwork!
Cleaning Up (the very end!)
- Wash your paint rollers and brushes (don’t allow the brushes to be immersed into a solution) – allow to dry for some time
- Proper cleanup helps you continue your job, use the same tool effectively and get a long run from them
Success!
Congrats! Now you've added value to your house (a more beautiful, perfect-look)! Don’t hesitate to express your inner creative energy to bring some charm to any room – it all started from that initial desire to start this DIY journey!
